Bender
Footwear collection inspired by classic men footwear silhouettes like monk straps, derbies and oxfords. Through this collection I want to celebrate everyone for who they are and give them a genderless shoe option.
Research
Industry Trends
There are several brands that are known for blurring the lines of gender in their designs like, Marc Jacobs, Phillip Lim, and a newer brand called Syro. These brands all provide genderless silhouettes in a range of sizes for any customer to wear.
Chunky platforms and creeper soles have always been a staple through the years, but they are making a comeback. We saw LV’s modern take on this feature through their introduction of the FW 2014 “Levitate” collection.
Throughout the years, a big trend on classic female shoes is the use of patent leather, so I wanted to incorporate this material in my collection and give it a new feel.

Inspiration
This collection features different materials and finishes, all mixed up to create a utilitarian vibe for everyday workwear. Inspired by traditional men’s footwear silhouettes, this collection was reimagined to incorporate femme detailings to create a genderless footwear line.
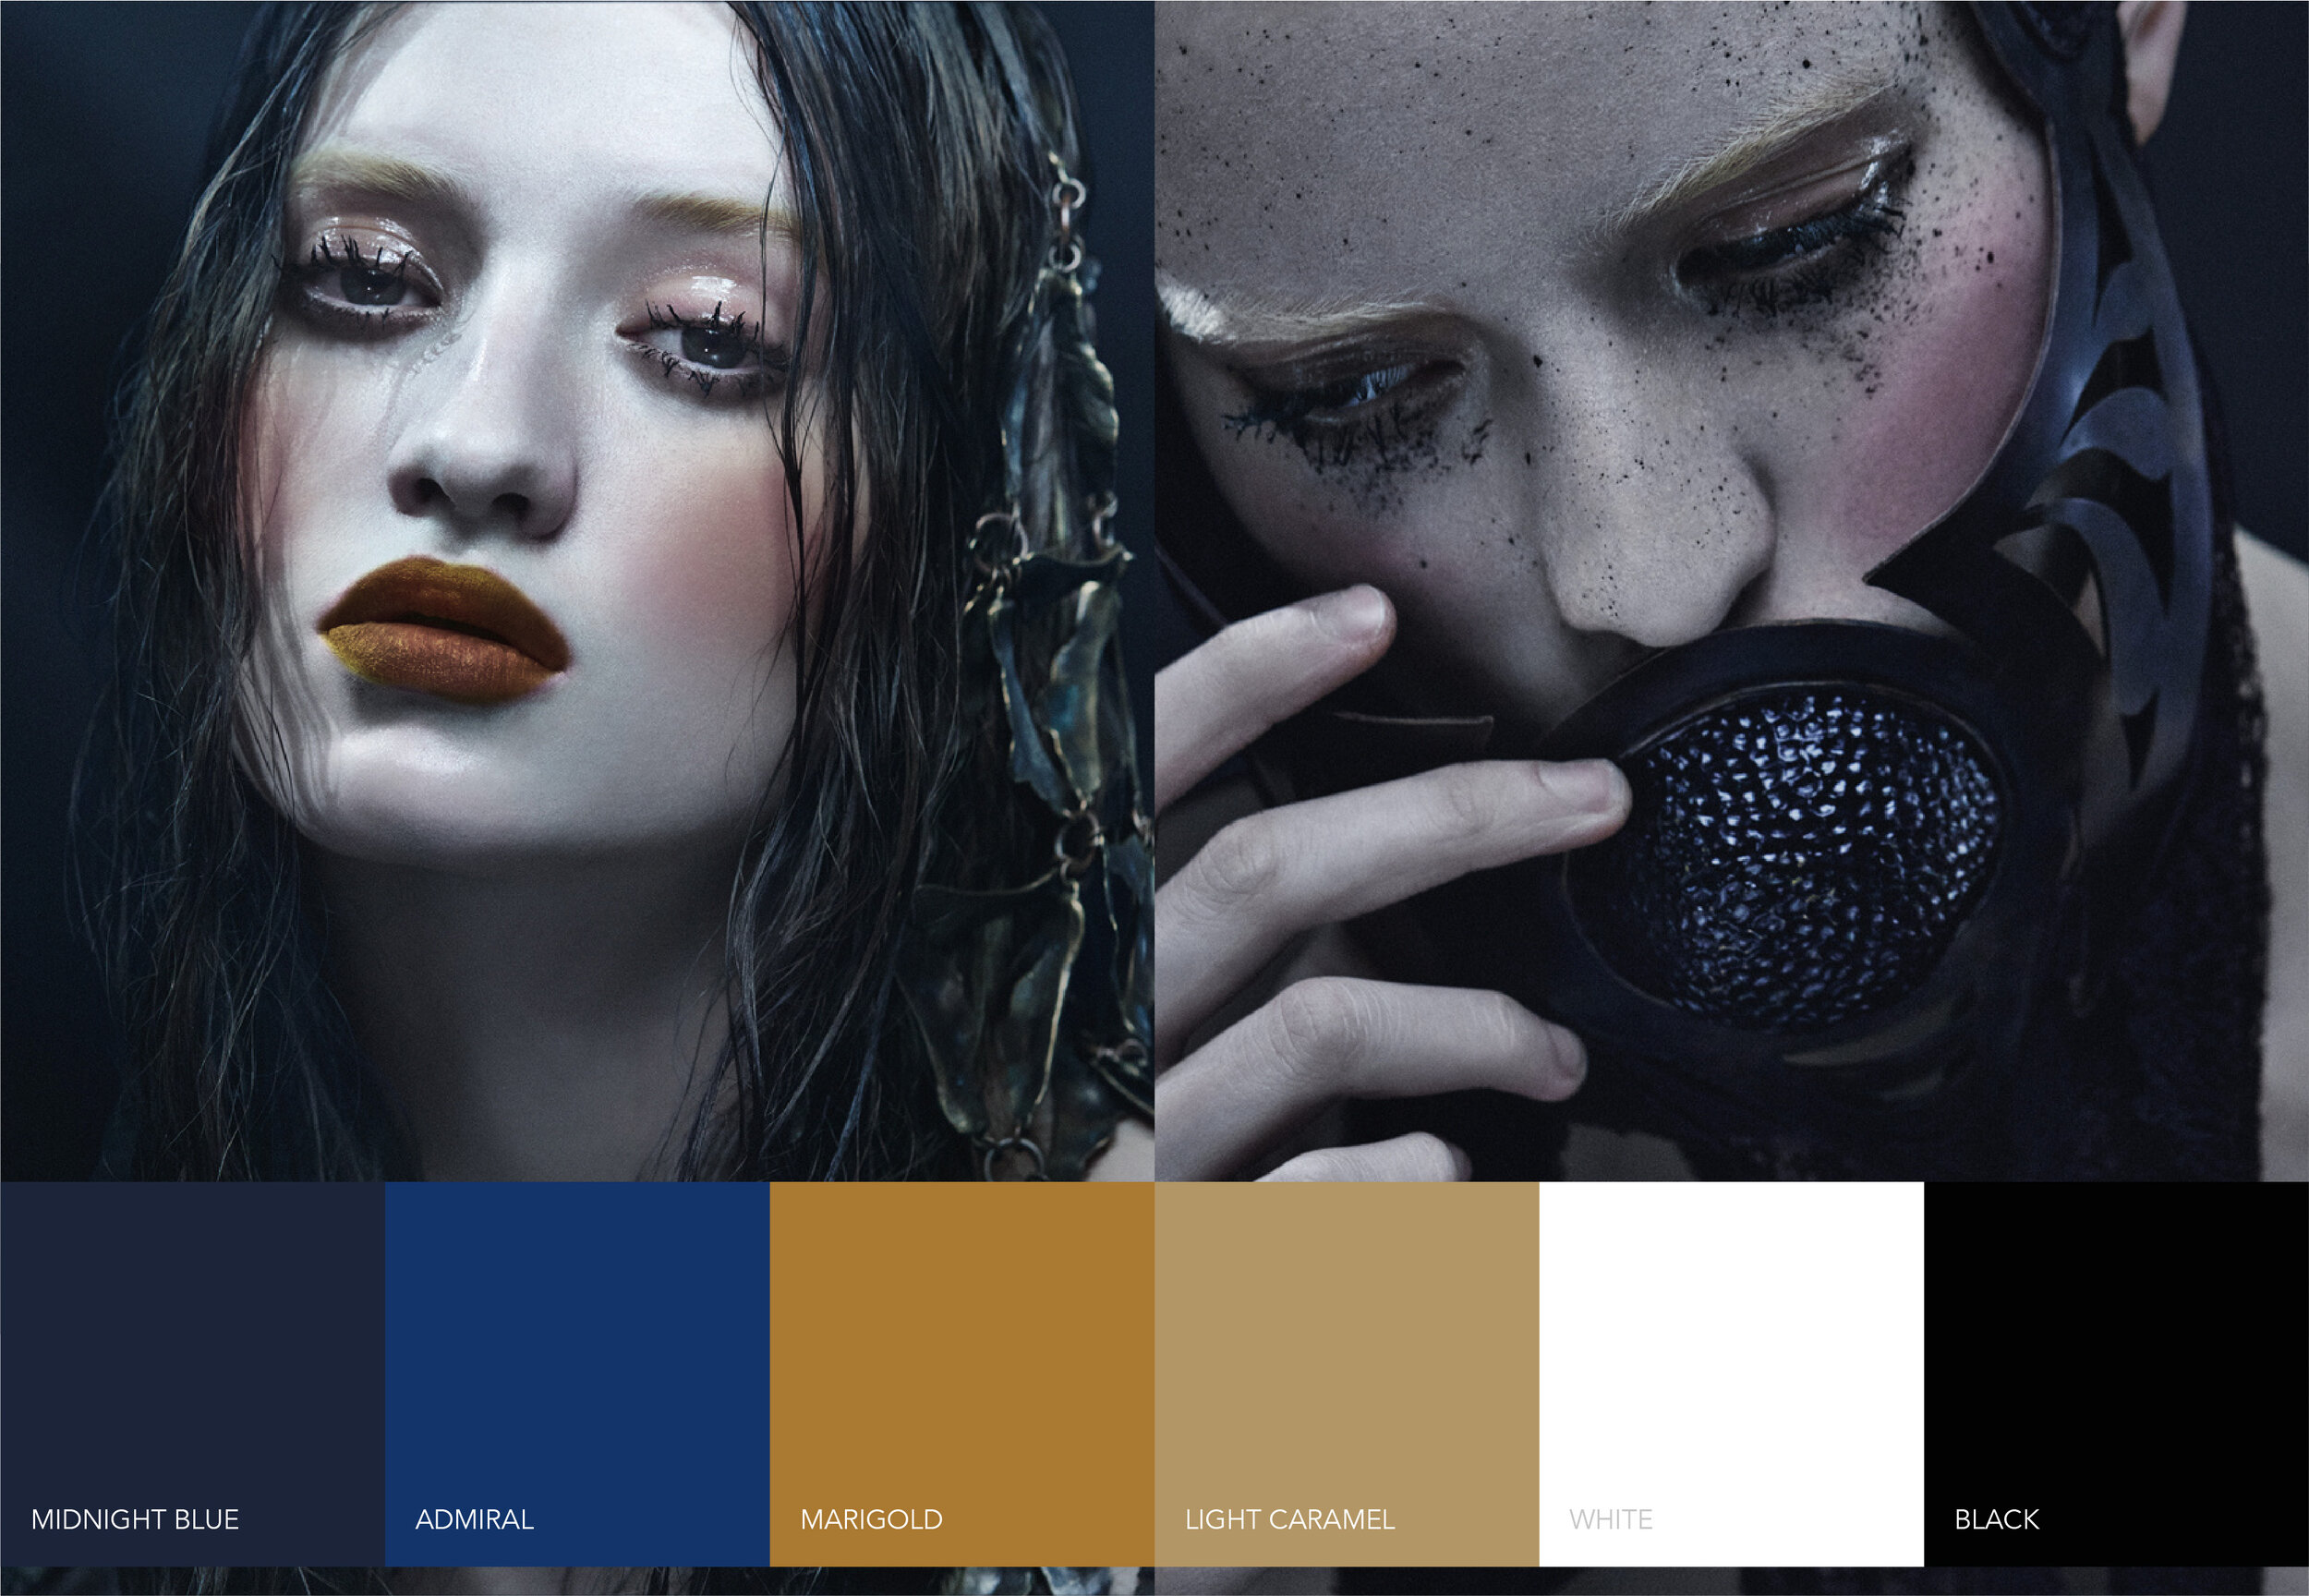
Mood Board

Color Board
Ideation
Form and concept exploration

Refined Ideation + Renderings

Manufacturing
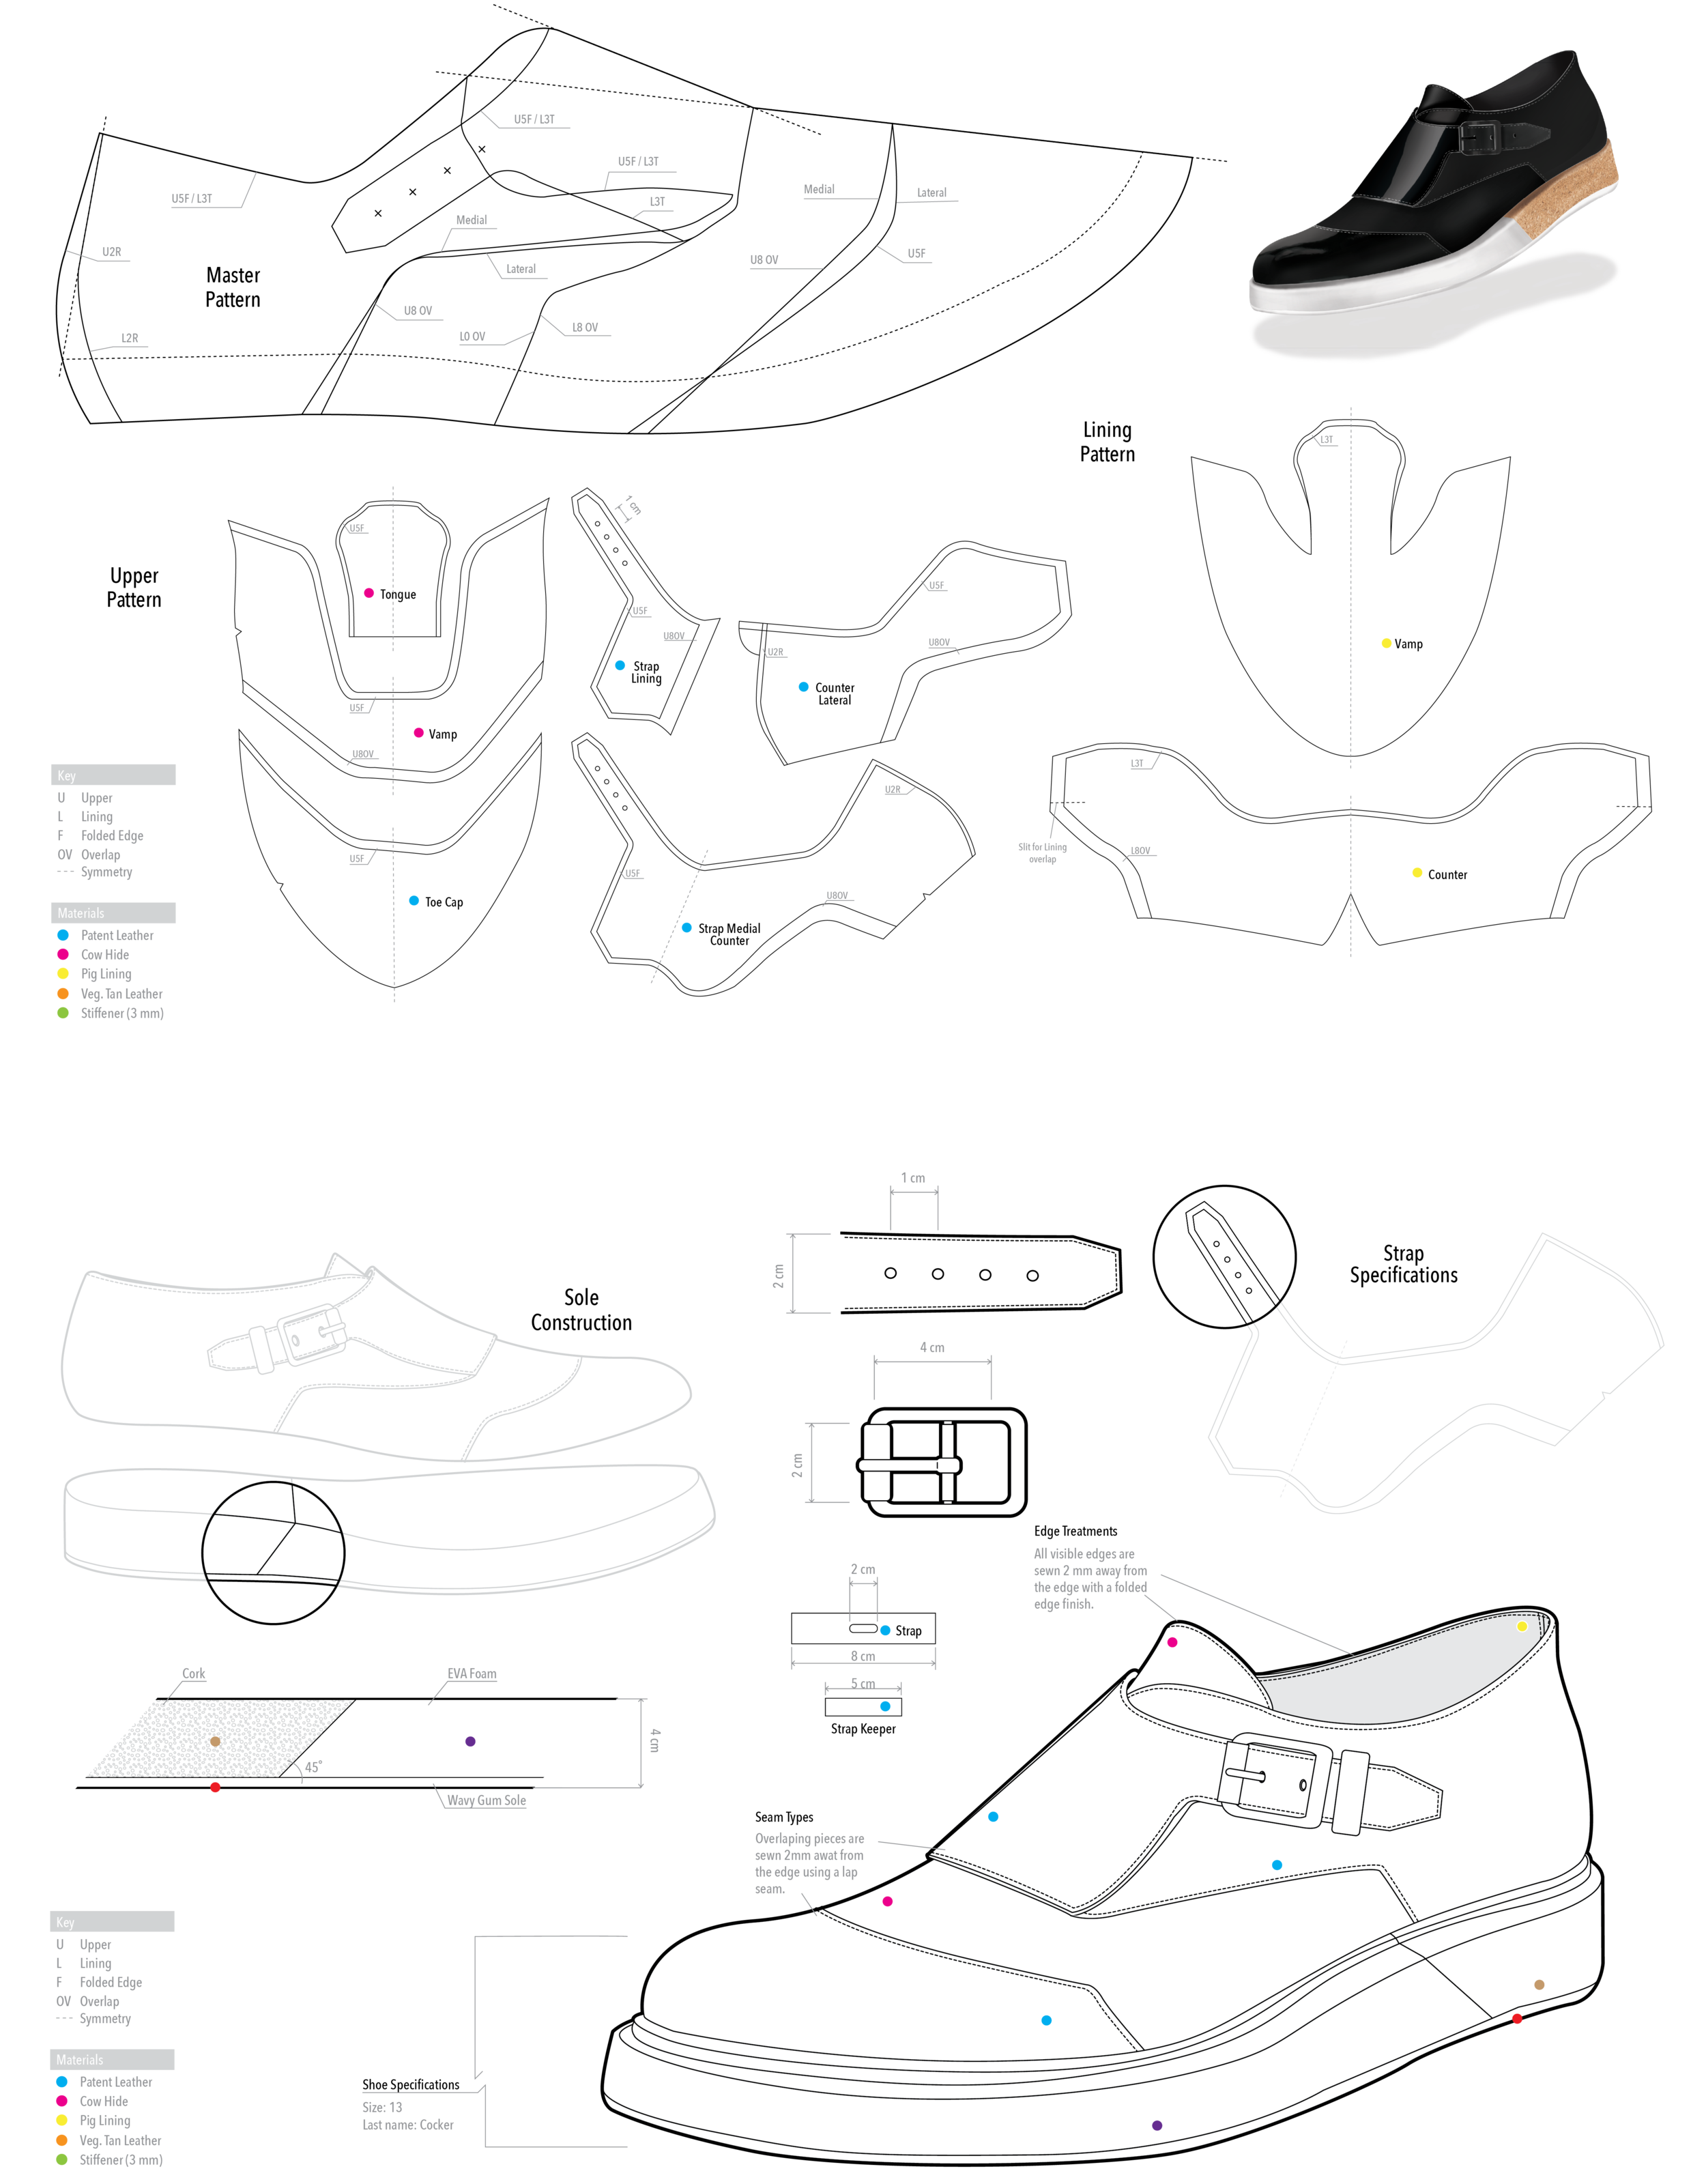
Pattern + Flat Development

Construction + Execution

STEP 1: PATTERNS & DIMENSIONS
I taped the shoe last all around and drew the design lines on it. After finalizing the 3D drawing on the last, I cut the tape down the center and flattened it out on pattern paper.

STEP 3: LASTING & GLUEING
After sewing the upper together, I went ahead and did the first 4 tack-downs onto the last (front, back and sides). This allowed me to keep the upper on the last and once I did that I was able to start pulling the upper tighter and tacking down to make sure the leather was forming onto the last.

STEP 5: SHAPING & ATTACHING THE SOLE
The last step was cutting out a sole in the shape of your last and sanding it down the edges so that it closely fits the sole. Then you attach glue on both ends and use a sole attaching machine to pressure the last onto the sole until attached.

STEP 2: STITCHING & TACKING
Once the pattern was done, I went ahead and cut all the pieces out in leather and put together a manufacturing order sewing sheet. All of my pattern pieces had stitch widths and allowances with annotations to make sure I followed the correct sewing order.

STEP 4: SANDING & FEATHERING
Once it was completely lasted and tacked down, I let it dry overnight. Afterwards, I removed all the tacks but there were some small wrinkled created on the sole of the shoe due to the lasting. In order to have a seamless and clean line when attaching the upper to the sole, those need to be feathered and sanded down.
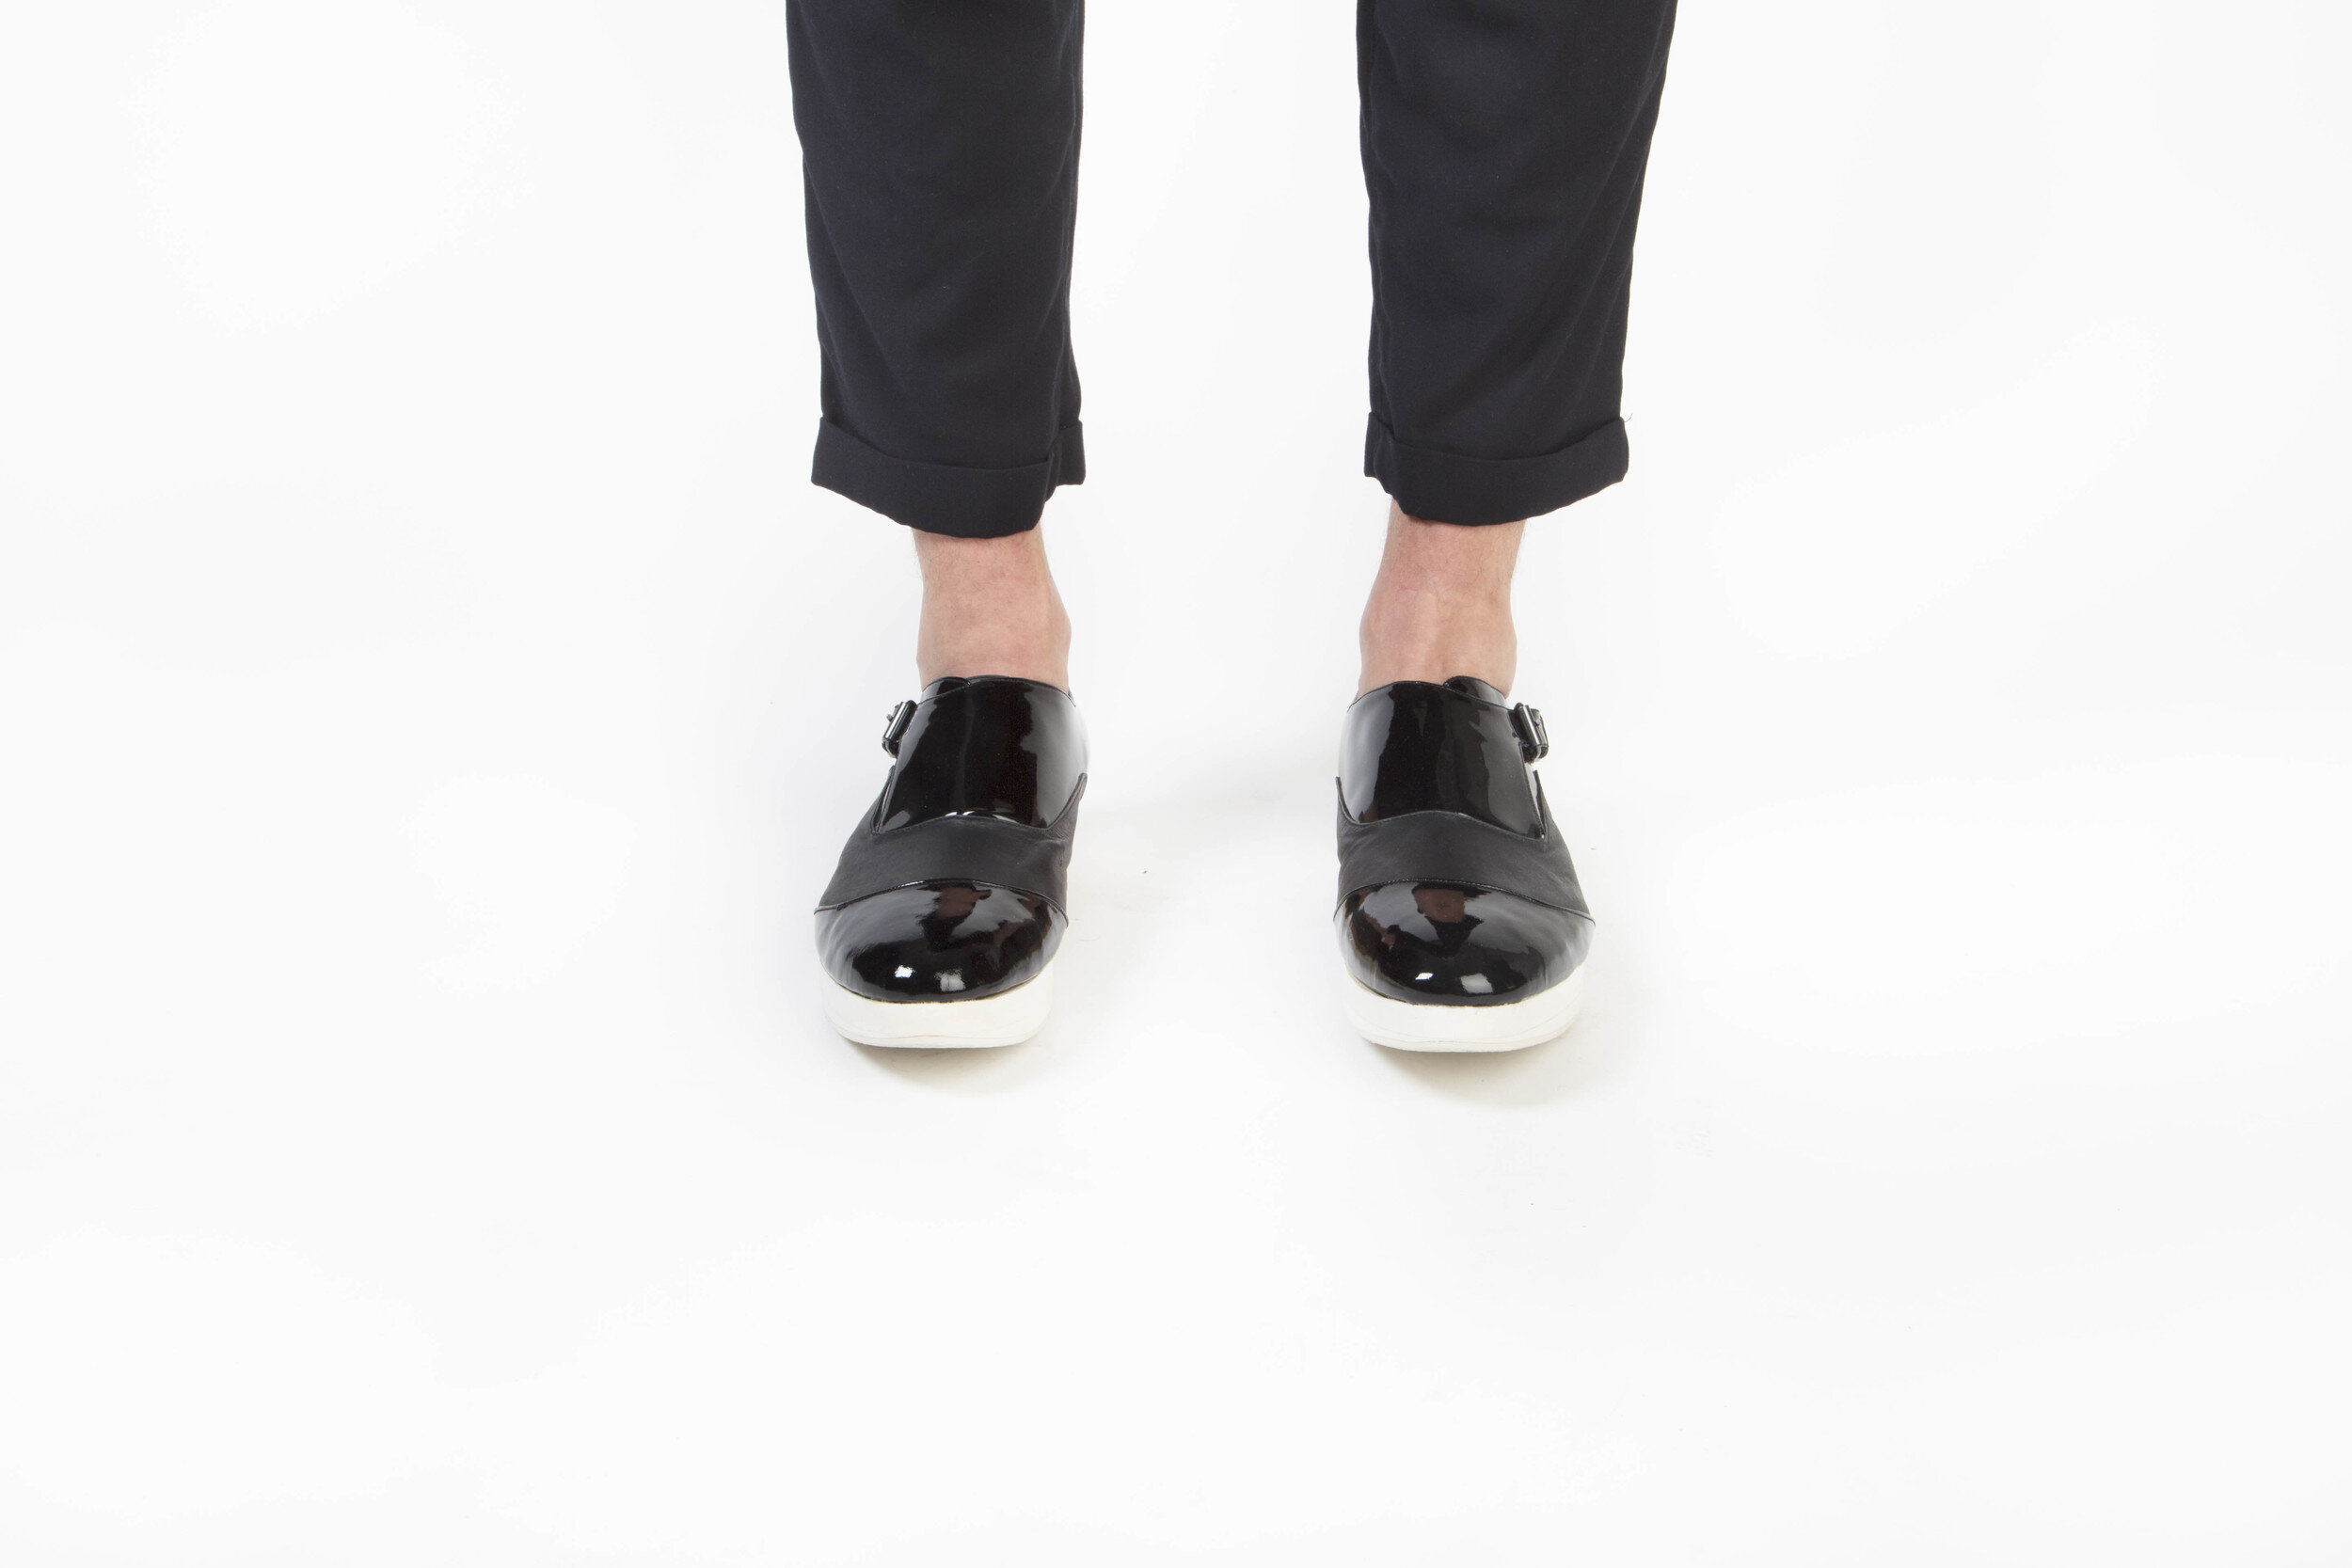
Final Product
Photography: Kara McCurdy | Model: Josh Brown | Hair and Make-up: Alexandra Vasquez Dheming